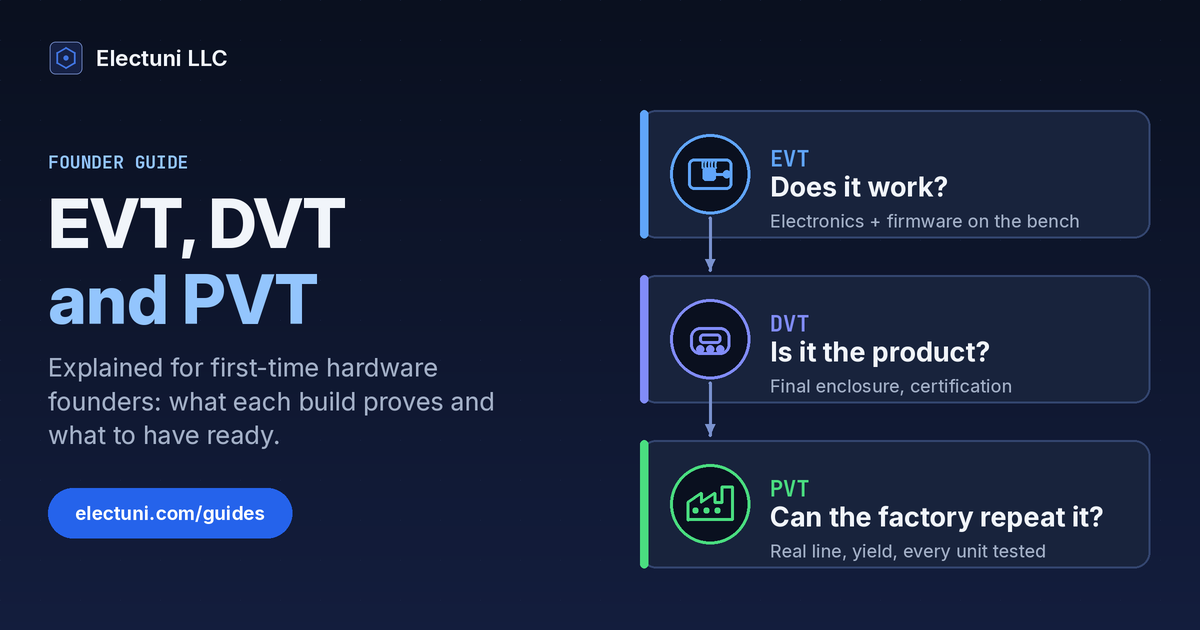
What EVT, DVT and PVT stand for
The three letters describe three builds, each one closer to the real product than the last.
- EVT, engineering validation test. Some teams say engineering verification test. Same build, same goal: prove the electronics and firmware do what the requirements say.
- DVT, design validation test. The whole product, in its final enclosure, with production-intent parts. This is where reliability and certification testing happen.
- PVT, production validation test. A pilot run on the real production line with the real tools, fixtures and test stations.
Two stages sit on either side. Before EVT there is the proto stage: breadboards, dev kits and rough boards that answer one risky question at a time. After PVT comes mass production, often shortened to MP, and the ramp to full volume.
The names matter less than the idea behind them. Each build has one question to answer, and you only move on when the answer is written down and agreed.
EVT: does the design work?
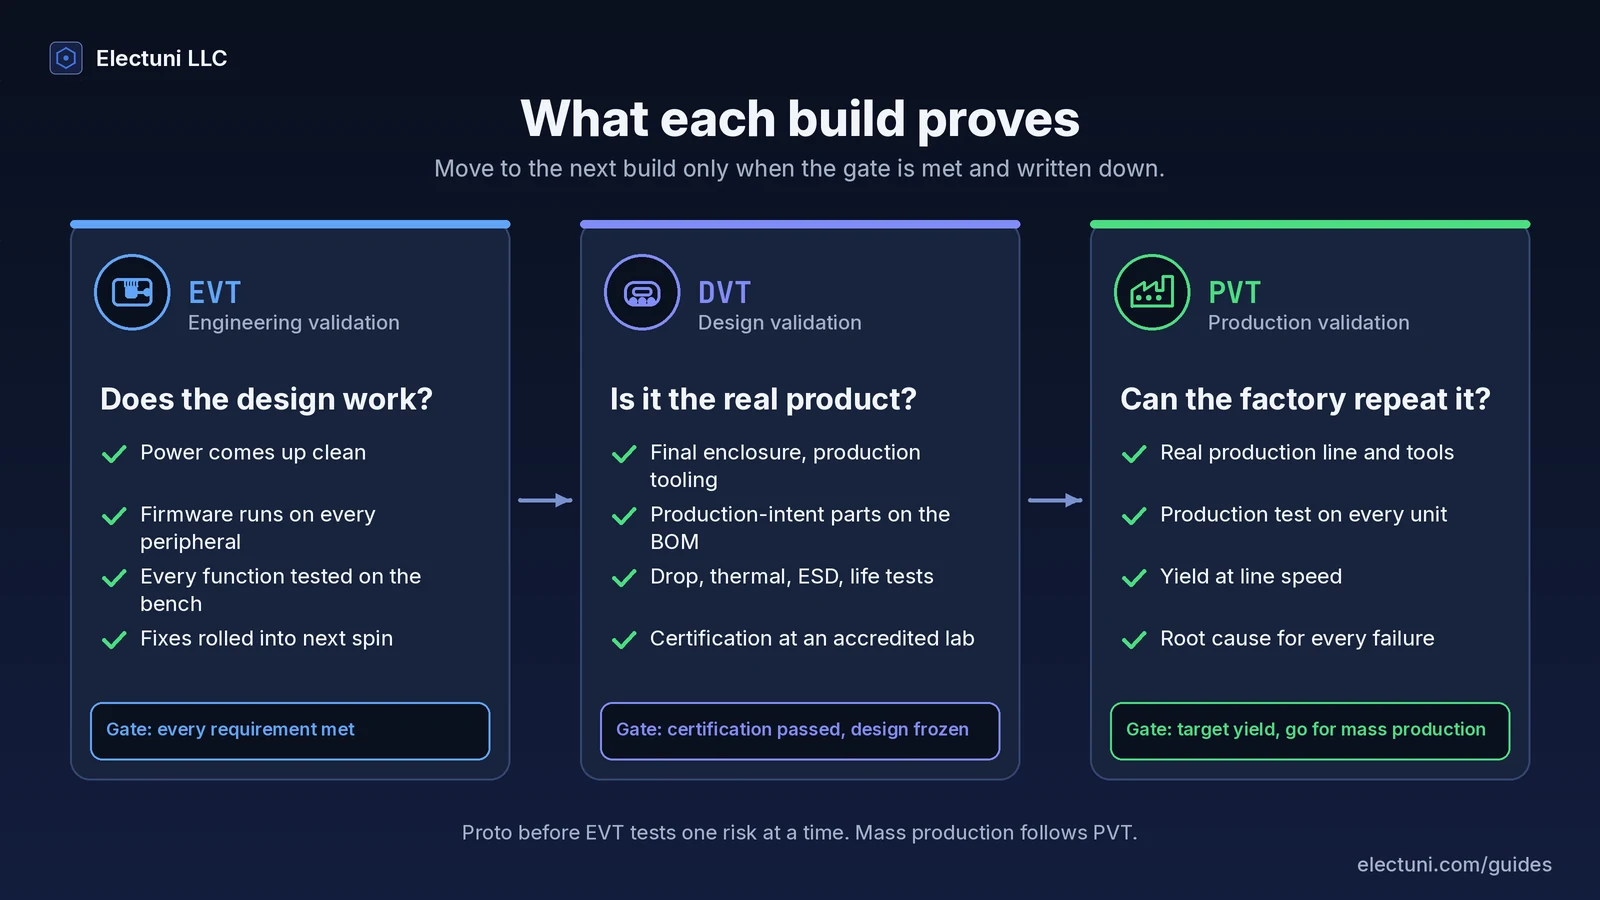
EVT is the first build where the board is the real board. The schematic and layout are the ones you intend to ship, the firmware is the real firmware, and the goal is to find every problem in the design while it is still cheap to fix.
Embedded Artistry describes EVT units as built "to test the functionality of your product against its requirements". In practice that means power comes up cleanly, every function works on the bench, current draw matches the battery budget, sensors read sensible values, radios connect and the firmware can be flashed and updated.
Entry criteria
- A written requirements document with numbers, not adjectives. "Runs 7 days on one charge" is testable. "Long battery life" is not.
- Schematic and layout reviewed, with DFM and DFT checks done before the files go to fabrication.
- Firmware that can at least boot, talk to every peripheral and report what it sees.
- A bring-up and test plan that says which tests run on which units.
Exit criteria
- At least one configuration meets every functional requirement. Instrumental and Embedded Artistry both use this as the EVT exit gate.
- Every failure found has a known cause and a fix that is in the next board revision.
- No open question that would force a new layout after the enclosure tooling is cut.
It is normal to run EVT more than once. A second EVT spin after bring-up is a sign the process is working, not that it failed.
DVT: is it the product?
DVT puts the proven electronics inside the real product. The enclosure comes from production tooling or a production-capable process, the parts on the BOM are the ones you will buy in volume, and the units look and feel like what a customer will open.
This build carries the heavy testing: drops, temperature and humidity, ESD, button and connector life cycles, battery tests, and the formal certification work. Embedded Artistry lists FCC, UL and Bluetooth certification as DVT activities, and EW Manufacturing names heat, drop, immersion and battery tests at this stage. Formal compliance testing is done by an accredited lab, not by the design team.
Entry criteria
- EVT exit met and the fixes rolled into the DVT revision.
- Production-intent BOM with second sources identified for anything single-source.
- Enclosure tooling ordered early enough that it is ready when the boards are.
- EMC pre-compliance run on EVT units, so the lab visit is a confirmation, not a discovery.
Exit criteria
- Certifications passed or, at the least, no open failures without a confirmed fix.
- Reliability and environmental tests passed on enough units to trust the result.
- Packaging, labels and the out-of-box experience final.
- Design frozen. Changes after this point go through a formal change process.
PVT: can the factory repeat it?
PVT is a rehearsal of mass production. The product design should not change here. What gets tested is the process: the line, the operators, the fixtures, the test stations and the suppliers.
Instrumental puts the PVT goal plainly: verify mass production yields at mass production speeds. MacroFab calls it "a mock run of mass production". Every unit goes through the same production test, and the factory reports first-pass yield, failure types and cycle time.
Entry criteria
- DVT exit met with a frozen design.
- Production test fixtures and test firmware built and checked against known good and known bad units.
- Work instructions, assembly drawings and the final BOM released to the factory.
- Parts for the full PVT quantity in hand, not on order.
Exit criteria
- Target yield reached at line speed on at least one line.
- Every failure on the line traced to a root cause with a corrective action in place.
- Cost per unit and cycle time confirmed against the plan.
PVT units are often built to sellable quality, which is why some teams ship them to their first customers.
How many units to build at each stage
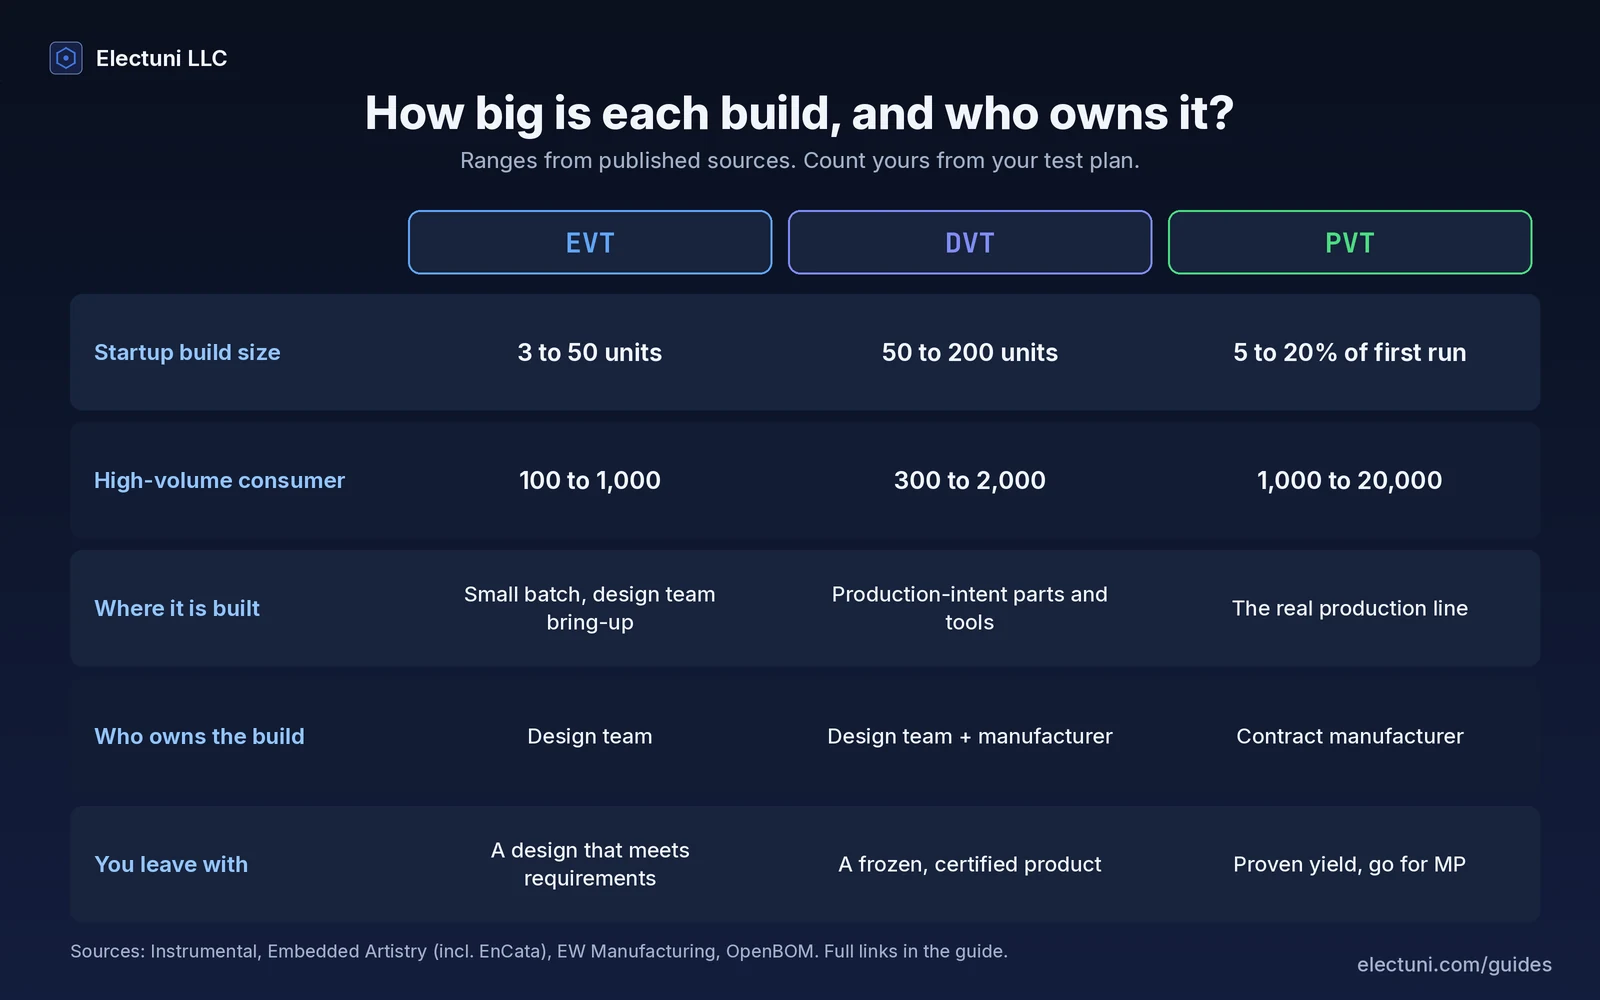
Published numbers differ by a factor of 20 or more, because writers describe very different products. A consumer phone accessory headed for a million units and a connected industrial sensor for a few thousand customers do not need the same build sizes. Here is what the sources actually say.
| Stage | Small-batch and startup sources | High-volume consumer source |
|---|---|---|
| Proto | 1 to 10 units (EW Manufacturing) | 10 or fewer (Instrumental) |
| EVT | 3 to 50 units (EnCata, cited by Embedded Artistry), 10 to 40 (OpenBOM), 20 to 50 (EW Manufacturing) | 100 to 1,000 (Instrumental) |
| DVT | 50 to 100 (OpenBOM), 50 to 200 (EW Manufacturing) | 300 to 2,000 (Instrumental) |
| PVT | 5 to 10% of the first production run (EW Manufacturing), 10 to 20% of the first purchase order (OpenBOM) | 1,000 to 20,000 (Instrumental) |
Do not pick a number from a table. Count it from your test plan:
- Units destroyed by testing: drop, ESD, immersion and life tests use units up.
- Units the certification lab keeps or needs, which the lab will tell you when you get a quote from them.
- Units for firmware development, which never come back to the test bench.
- Units for beta users, investors and marketing photos.
- Spares, because some units will fail and you need enough left to see a pattern.
Higher unit cost pushes the numbers down. A cheap consumer gadget can afford hundreds of DVT units. An expensive instrument might run a few dozen and lean harder on analysis.
What to have ready before each build
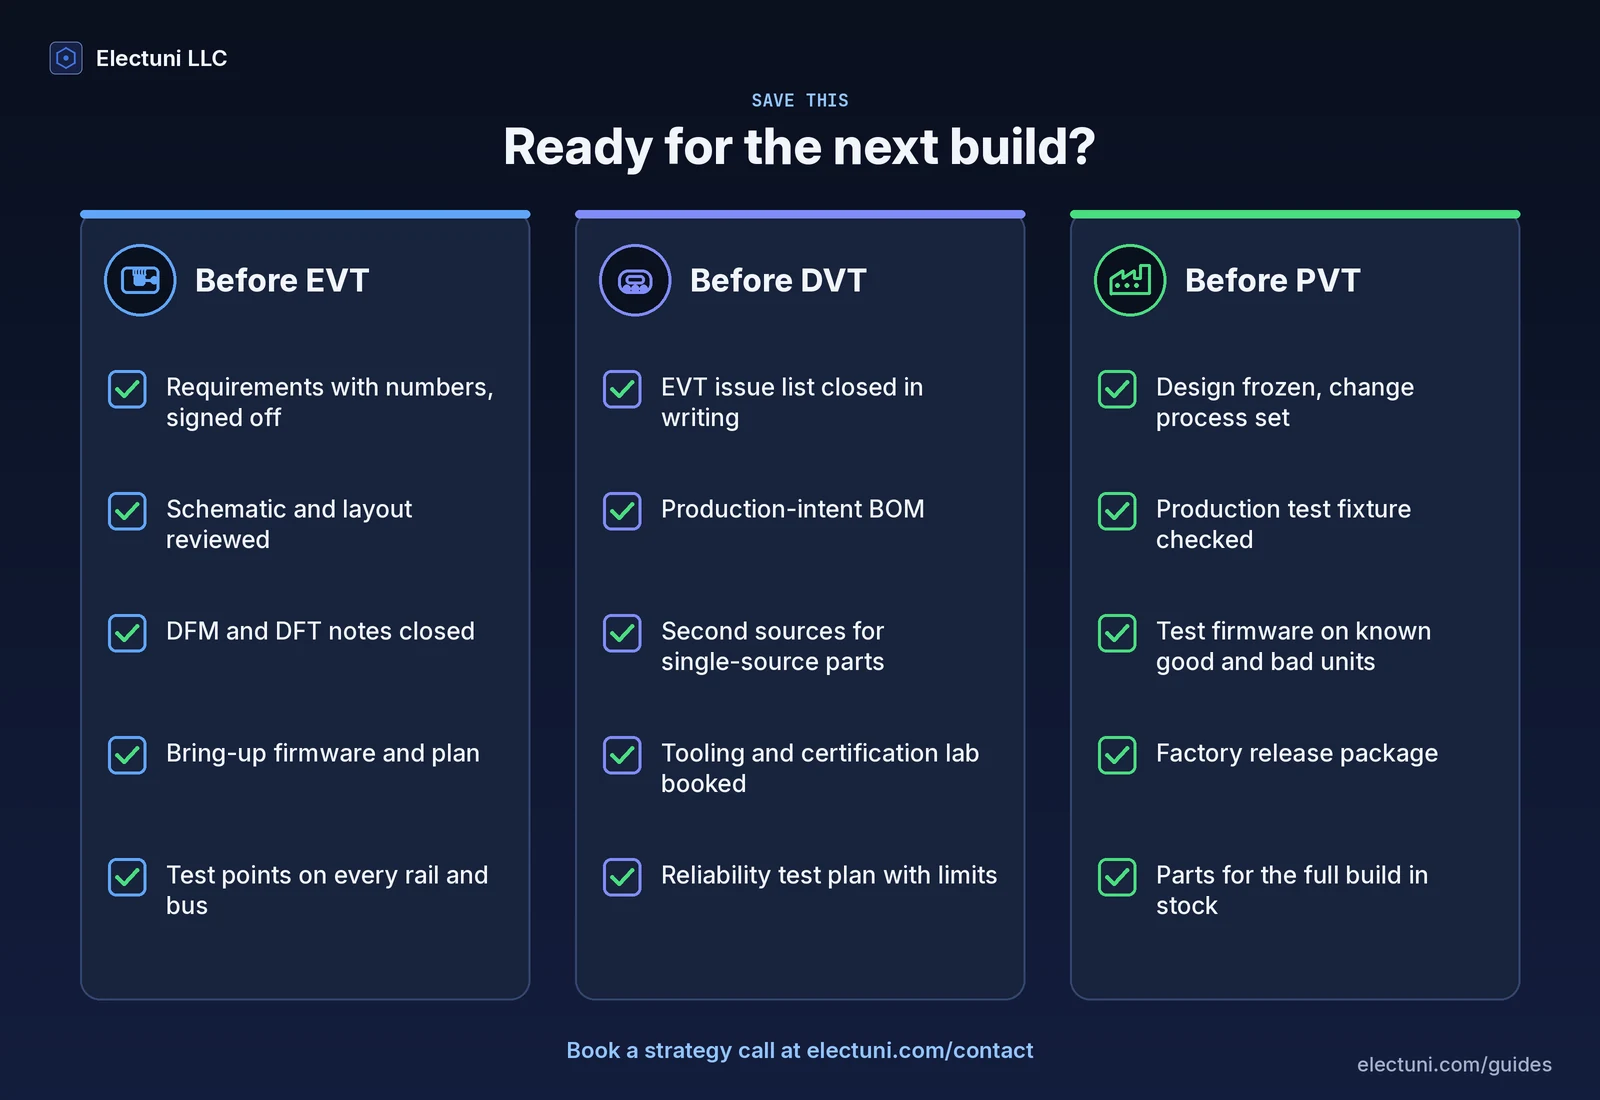
Most slipped builds trace back to something that was not ready, not to a bad design. Use this list as a gate before you place the order for each build.
Before EVT
- Requirements with numbers, signed off by whoever will judge the product.
- Reviewed schematic and layout, DFM and DFT notes closed.
- Bring-up firmware and a written bring-up plan.
- Test points on the board for every rail and bus you will need to probe.
Before DVT
- EVT issues list with every item closed or accepted in writing.
- Production-intent BOM, lead times checked, second sources noted.
- Enclosure tooling scheduled, and the certification lab booked.
- A reliability test plan with pass and fail limits.
Before PVT
- Frozen design and a change process for anything after it.
- Production test fixture and test firmware, checked on known good and known bad units.
- Release package for the factory: fabrication and assembly files, BOM, drawings, work instructions.
- Parts for the full build in stock.
Common mistakes first-time founders make
- Treating a working prototype as EVT. A dev kit with wires proves the idea, not the board. If the layout, power design and firmware are not the shipping versions, you have not started EVT.
- Leaving firmware for later. Firmware finds hardware bugs. Boards that only get a blink test in EVT hide problems that surface in DVT, when the enclosure tooling is already cut.
- Booking certification after DVT. Labs have queues. Run pre-compliance on EVT units and book the lab while DVT parts are on order.
- Changing the design in DVT without re-testing. A "small" fix to pass one test can break another. Every change after EVT needs to know which tests it invalidates.
- Building too few DVT units. Destructive tests and the lab use up units fast. Fictiv warns that teams who build too few end up with barely enough left to test anything with statistical meaning.
- No test fixture until PVT. The fixture needs its own design, firmware and debug time. Start it during DVT, or PVT becomes a fixture project.
- No written exit criteria. Without them every build "mostly passes" and the schedule slides one build at a time.
How Electuni handles each stage
Electuni LLC runs every project through the same six steps: Discovery, Architecture, Design, Review, Prototype and Handoff. Here is how they line up with the builds.
- Discovery and Architecture, before EVT. Written requirements and constraints, a block diagram, key component choices and a risk list. This is also where we agree what each build has to prove, so the exit criteria exist before any board is ordered.
- Design and Review, the EVT design. Schematics, PCB layout, firmware architecture and enclosure CAD, as the scope requires. DFM and DFT checks and a design review with your team happen before files go to fabrication. Our lead engineer is IPC CID+ certified.
- Prototype, the EVT builds. Boards are fabricated, assembled and brought up with firmware, then tested against the requirements. Fixes go into the next spin, with DFM and DFT improvements made along the way.
- Handoff, into DVT and PVT. Production files, BOM, source code and the full documentation package, so your contract manufacturer can build DVT and PVT units from the same release. We design for certification from the start and support the manufacturing steps, while compliance testing itself is done by an accredited lab.
Each step can be taken on its own. Some teams bring us in for a design review before DVT, or for firmware on a board they already have. A mutual NDA is signed before any technical discussion, and you own the designs, code and files we deliver. Since 2016 we have delivered 500+ PCB designs and 500+ production boards have shipped.
For a real example of bring-up work on a funded consumer product, read the CHEFFY EGOR case study. The full process, with what you receive at each step, is on How we work. If you are a founder planning your first board, start with PCB design for startups, hardware design, firmware development and 3D enclosure design.